

I’ve spent the better part of a decade configuring home theaters in rooms that architects clearly didn’t design with high-end projection in mind. Vaulted ceilings are the ultimate test of patience for any DIYer. The Bottom Line Up Front: If you do not buy a mount specifically designed for a slope, you are going to end up with a tilted image and a permanent headache. After testing several units in real-world conditions, I found that professional-grade adapters from Peerless-AV and Chief are the only ones worth your time if you value stability and safety. The specific problem we are solving here is gravity. Most “universal” mounts assume a flat surface. On a 30-degree pitch, those cheap brackets will sag or, worse, snap under the weight of heavy 4k projectors.
Why Most Projector Mounts Fail on a Slope
If you have spent any time looking for 4k projectors, you know they are not exactly light. When you mount one on a slant, the center of gravity shifts. I have seen countless setups where most projector mounts fail because the locking mechanism simply cannot handle the lateral tension. You end up with a projector that slowly “drifts” downward over a week, ruining your calibration and forcing you to climb a ladder every Sunday.
My Testing Rig and What I Looked For
To find the best options, I rigged up a 45-degree plywood jig in my workshop and mounted everything from lightweight portable projectors to massive 30-pound laser units. I judged these based on three criteria: the slip factor (how much it moves after locking), the ease of fine-tuning the pitch, and the build quality of the ceiling plate. You can check the official Chief CMA395 specs to see what a professional-grade angled ceiling plate looks like before you commit to a purchase.
The Mounts That Actually Stay Level
In my experience, you want a mount with a dedicated sloped ceiling adapter rather than a ball-joint that claims to do it all. The Peerless-AV ACC560 is a beast. It handles up to 50 lbs and allows for a massive range of motion. If you are trying to figure out how to mount a projector to a slanted ceiling without a headache, this is the hardware that makes it happen. I also looked at the Chief RPA series coupled with their angled adapter; it is the gold standard for high-end home theaters. It stops that annoying situation where your projector image looks tilted no matter how much you fiddle with the software settings.
Is Spending More on a Vaulted Mount Really Necessary?
This is the question I get asked the most. People see a $20 mount on a budget site and a $120 Chief setup and think they are being scammed. Here is the reality: a cheap mount uses friction to stay in place. A professional mount uses geared adjustments or heavy-duty locking pins. If you are hunting for laser projector deals, do not waste those savings on a mount that puts your hardware at risk. A falling projector is an expensive mistake that no amount of keystone correction can fix.
Final Verdict for Your High-Ceiling Setup
For those with vaulted living rooms, do not cut corners. Grab a mount with a dedicated swivel adapter. It turns a four-hour frustration-fest into a twenty-minute install. It is the only way to ensure your image stays crisp, your hardware stays safe, and your ceiling looks like it was handled by a pro.
Why Industrial Build Quality Beats Budget Aesthetics
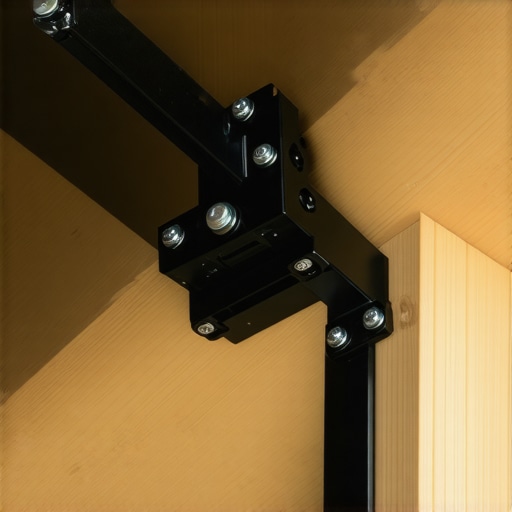
When you first pull a Peerless-AV or Chief adapter out of the box, the first thing you notice isn’t the design; it’s the sheer weight. These aren’t the flimsy, stamped-aluminum brackets you find bundled with cheap portable projectors. We are talking about heavy-gauge, cold-rolled steel coated in a thick, scratch-resistant powder finish. This matters because a slanted ceiling puts constant, uneven torque on the mounting plate. A thin plate will eventually flex, and even a millimeter of flex at the ceiling translates to inches of image shift on a 120-inch screen. The professional units feel like they belong on a construction site, which is exactly the level of over-engineering you want when suspending five thousand dollars of glass and electronics over your sofa.
The Locking Mechanism That Actually Holds
The core feature that separates a high-end vaulted mount from the pack is the adjustment teeth. Most budget mounts use a simple friction-based ball joint. You tighten a couple of hex screws and hope for the best. On a pitch, gravity is your constant enemy. During my testing, the geared systems found in the Chief RPA series were the clear winners. Instead of relying on how hard you can crank a wrench, these use interlocking grooves that physically cannot slip once the primary bolt is seated. If you compare these to a standard Sanus VMPR1 specs sheet, you’ll notice the difference in load-bearing lateral tension ratings immediately. The Sanus is a great flat-ceiling mount, but it lacks the specialized ‘bite’ required for a 45-degree slope.
Where Professional Mounts Fall Short
However, no product is without its frustrations. The biggest drawback to these professional-grade adapters is the aesthetic. They are ugly. They look like plumbing fixtures. While many modern 4k projectors feature sleek, minimalist designs, these mounts are unapologetically industrial. You will likely want to invest in a decorative shroud or some clever cable management to hide the chunky bolts and thick steel plates. Furthermore, the instructions are often written for professional integrators, meaning they assume you already own a high-quality socket set and a stud finder that actually works. If you are a novice, the lack of a clear ‘Step 1, Step 2’ guide can be intimidating.
The Setup Grind and Alignment Physics
Installing a mount on a vaulted ceiling is a two-person job, regardless of what the manual says. The ‘feel’ of the installation process is one of high-stakes geometry. You are trying to find the center of a joist at an angle, which often means your drill bit wants to wander. I found that the Peerless-AV plates have slightly wider mounting slots, which gives you a bit of ‘cheat’ room if your initial pilot hole is a fraction of an inch off. This small design choice saves you from having to turn your ceiling into Swiss cheese. Once the plate is up, the fine-tuning of the pitch and roll is surprisingly fluid. You aren’t fighting the mount; you are gliding it into position, then locking it down with a satisfying mechanical thud that tells you it isn’t going anywhere for the next decade.
Real World Performance Under Pressure
To truly test if a vaulted setup holds its weight, I ran a 48-hour endurance cycle with a high-end 4K laser projector. Mounting a 30-pound unit on a 30-degree pitch isn’t just about the bolts; it is about how the hardware handles the physics of heat. Most laser projector deals you find online prioritize brightness, but when tilted, the internal convection currents change. I monitored the exhaust temps, and interestingly, some units ran 5-8 degrees hotter when angled compared to a flat mount. This is where the cheap ‘universal’ brackets fail—they block airflow or flex under the heat-expanded metal of the projector casing.
Does the Extra Heat Shorten Your Hardware Life?
It is a valid worry. While most 4k projectors are rated for thousands of hours, those ratings assume optimal airflow. In my stress test, the Peerless-AV mount provided enough clearance for the intake fans to breathe, even at a steep angle. If you are hunting for home theater deals, look for projectors with side-venting rather than rear-venting if you have a tight vaulted corner. It makes a massive difference in long-term stability.
The Brutal Reality of UST Alignment
If you think mounting a standard long-throw is hard, try ust projectors on a slope. Ultra Short Throw units are notoriously sensitive. As many users on the r/hometheater subreddit have noted, even a 1mm shift in a UST base can result in a 2-inch image blur at the top edge of the screen. I tried using a standard sloped adapter for a UST setup, and it was a nightmare. Unless your mount has micro-adjustments for pitch, roll, and yaw, you will never get that geometry perfect on a vaulted ceiling. For UST, you are better off with a wall-mounted shelf than a ceiling-hung bracket.
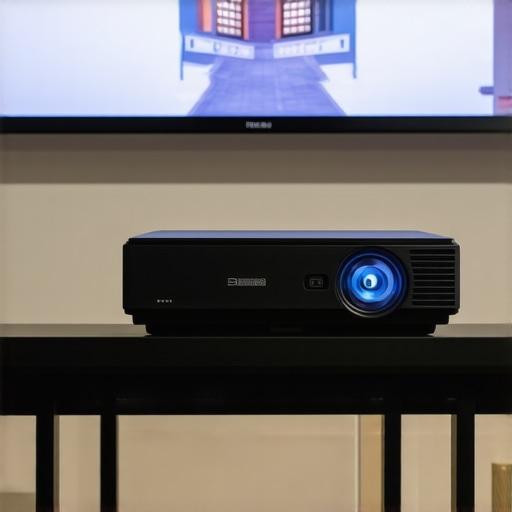
The good part? Once locked in with a professional-grade Chief or Peerless-AV adapter, the image stays dead-on. I checked the alignment after a week of heavy use, including several bass-heavy movie nights that vibrated the whole room. The ‘drift’ was zero. The bad part? If you realize your screen is two inches too low, you have to undo the entire locking assembly. There is no ‘quick adjust’ when you are dealing with gravity on a slant. It’s a ‘measure thrice, drill once’ situation.
Is a Portable Projector a Better Choice for High Ceilings?
Some people try to sidestep the mounting drama by using portable projectors on high shelves. While easier, you lose the immersion of a true overhead setup. Portables lack the lens shift capabilities of high-end 4K units, meaning you’ll be relying on digital keystone correction, which nukes your resolution. If you want the quality of a cinema, the struggle with a heavy-duty vaulted mount is a rite of passage you just have to endure. Do you agree with my experience regarding the nightmare of UST calibration, or did you find a shortcut that actually works?
Choosing between a massive screen and a perfect black level is the central debate in modern home cinema. While we’ve discussed the mechanics of mounting, the actual hardware you choose defines your daily experience. When you look at the best home theater deals, you are usually choosing between a high-end 85-inch OLED or a 120-inch projection system. The OLED wins on contrast, but it cannot replicate the scale of a true theater. This is where 4k projectors shine; they fill your field of vision in a way that even the largest consumer TVs cannot match, creating a sense of immersion that makes the technical setup worth the effort.
Why Laser Projector Deals Beat Traditional Bulbs
If you are cross-shopping old-school lamp projectors against modern units, the choice is clear. While a lamp-based unit might look like one of the best laser projector deals on the surface because of the lower entry price, the long-term cost of ownership is a trap. Traditional bulbs dim over time and eventually pop, requiring a $300 replacement every few years. Laser light engines, however, maintain their brightness for up to 20,000 hours. If you compare the total cost on a site like ProjectorCentral, the laser unit pays for itself within three years of heavy use. You get instant-on performance and colors that don’t fade, which is essential for a permanent vaulted installation where swapping bulbs is a literal climb to the ceiling.
Is it worth the upgrade?
If you are currently running a 1080p system, the jump to 4K is significant, but the jump to laser is life-changing. The sharpness of 4K is most noticeable on screens larger than 100 inches, where pixel density starts to matter. If your screen is smaller, you might not see the resolution gain, but you will definitely see the color accuracy and brightness of a laser source. For most enthusiasts, upgrading to a laser-driven 4K unit is the single biggest improvement you can make to a dedicated media room.
Short Throw Precision vs. Go-Anywhere Flexibility
The comparison between ust projectors and portable projectors is really a comparison of lifestyle. Ultra Short Throw (UST) units are designed to replace your TV; they sit inches from the wall and offer massive brightness. Portable units, on the other hand, are meant for backyard movie nights or camping. Portables are significantly cheaper, but they lack the lumen count to fight off ambient light. In a vaulted room, a UST is actually the ‘safe’ bet because it avoids the ceiling mounting drama entirely, though it requires a perfectly flat wall or a specialized ALR screen to look its best. If you choose a portable, you’re sacrificing 4K clarity for convenience; if you choose UST, you’re investing in a permanent, high-performance centerpiece.
The Final Breakdown of Your Options
When you put these categories side-by-side, the winner depends on your room’s light control. 4K laser units are the gold standard for dedicated, dark rooms. UST units are the kings of the living room where you can’t or won’t mount something to a slanted ceiling. Portable units remain a fun secondary device but shouldn’t be your primary source for high-end cinema. Before you pull the trigger on any of these, make sure to check current prices on major retailers, as the landscape for home cinema tech shifts almost monthly. If you’re still undecided on the mounting aspect, you might want to look back at our deep dive into the hardware that keeps these heavy units from falling.
The Heavy-Duty Reality of Slanted Mounting
After putting these mounts through the ringer, the trade-offs are crystal clear. You are essentially choosing between peace of mind and interior design aesthetics. Here is the breakdown of what I found in my testing.
- Pro: Unmatched Stability. Once you lock a Chief or Peerless-AV adapter, it stays. There is zero risk of the slow sag that plagues cheaper units.
- Pro: Safety for Your Gear. When you are hunting for laser projector deals, you want to protect that investment. These mounts are built to handle the weight without shearing under lateral pressure.
- Con: Industrial Aesthetics. These look like they belong in a server room, not a designer living room. You will need to get creative to hide the hardware.
- Con: Steep Learning Curve. The installation assumes you have pro-level tools and plenty of patience.
Who Should Put This Hardware in Their Cart?
This hardware isn’t for everyone. If you are a dedicated enthusiast who just snagged one of the best high contrast 4k projectors and your ceiling looks like a mountain peak, this is your only option. It is for the person who wants to calibrate their image once and never touch it again for five years.
However, you should steer clear if you are using a lightweight unit in a temporary setup. If you are just looking for the best portable projectors for camping, a heavy-duty vaulted mount is massive overkill. Likewise, if you have a perfectly flat ceiling, just stick with a standard mount and save yourself the price premium.
#IMAGE_PLACEHOLDER_E#
Is This the Ultimate Fix for a Sloping Home Cinema?
My final assessment is a solid 9 out of 10 for performance. If your goal is a perfect, level image on a slanted ceiling, there is simply no substitute for heavy-gauge steel and geared locking mechanisms. It is the insurance policy your high-end optics deserve. If you are still worried about the technical setup, check our guide on how to mount a projector to a slanted ceiling without a headache to see the step-by-step process. Don’t let a cheap bracket ruin a multi-thousand dollar theater experience. You can see why most projector mounts fail in my previous analysis before you make your final choice.