

Bottom Line Up Front: Achieving a Clearer Image with Budget Walls
If you’re using a low-cost white wall for your projector setup, chances are the image quality isn’t meeting your expectations. While a white wall is a common and affordable surface, its surface quality and color tone can significantly affect your viewing experience. In this review, I’ll explore practical, low-cost strategies to enhance your projected image, focusing on wall preparation, ambient lighting, and projector settings, to help you get the most out of your setup without breaking the bank.
What This Guide Offers
This guide aims to solve the common problem of blurry, washed-out, or uneven images caused by inexpensive or suboptimal projection surfaces. I’ll share insights from personal experience and technical knowledge to recommend effective techniques for improving image sharpness, contrast, and color accuracy when you’re limited to a cheap white wall. Whether you’re a casual viewer or an enthusiast, these tips will help you elevate your home theater experience.
Key Criteria for Evaluation
- Surface Quality: Texture, color, and flatness of the wall.
- Ambient Light Control: Managing room lighting to improve contrast and visibility.
- Projector Settings: Calibration, focus, and color adjustments.
- Additional Techniques: Use of inexpensive accessories or DIY modifications.
By systematically examining these aspects, I aim to provide a comprehensive guide to optimize your projection image. Now, let’s delve into specific methods to turn your budget white wall into a cinematic canvas.
Core Offerings and Practical Features
The foundation of a better projected image begins with surface quality. A wall’s texture plays a pivotal role—smooth, matte finishes minimize light scattering, resulting in sharper images with better contrast. If your wall has a glossy or uneven surface, the light from your projector reflects unpredictably, causing glare or blurriness. Applying a matte, neutral-colored paint creates a uniform surface that enhances image clarity without expensive equipment.
Ambient lighting control is equally critical. Even dim, colored lights can wash out the image and reduce contrast. Making simple modifications like blackout curtains or repositioning ambient lights can dramatically improve perceived image quality. For instance, reducing ambient light in the room enhances contrast ratio, making dark scenes more detailed and vibrant.
Calibrating Projector Settings for Better Clarity
Proper projector calibration, including focus, keystone correction, and color adjustments, impacts image sharpness and color accuracy. Modern projectors often feature automatic calibration tools, but manual tweaks help optimize the image further. Focus adjustments are particularly crucial; a slight misfocus can cause visible blurring across the entire screen, so fine-tuning this setting is essential for crisp visuals.
Color calibration ensures accurate reproduction of hues. Using built-in menus or external calibration tools, adjusting contrast and brightness can prevent washed-out images and deepen blacks. These settings make a noticeable difference, especially when working with less-than-ideal projection surfaces.
Enhancing the Surface with DIY and Cost-Effective Solutions
Beyond painting, shadow boxes or fabric screens can serve as portable, inexpensive alternatives to improve image quality. Stretching a blackout cloth or using foam core boards painted with matte black paint can create a more uniform surface that reflects less ambient light.
One overlooked detail is the wall’s color. A darker, neutral hue absorbs stray light better than white, which can bounce light back into the room. Adding a simple, inexpensive light-absorbing material behind the projection area can reduce reflections and improve contrast.
It’s worth noting that, per industry standards like the
508 standard for TV displays, achieving a high contrast ratio remains essential. While a dedicated screen often surpasses bare walls, these low-cost modifications can bridge the gap on a budget.
Minor Flaws and Room for Improvement
One slight frustration is that painted walls and DIY solutions require time and effort to achieve optimal results. Additionally, some surfaces may not perfectly suppress light scattering, which means the image may still lack the crispness found on specialized screens. Nonetheless, these tweaks provide substantial improvements for minimal expense and effort.
Performance Analysis of High-End Projectors in Demanding Conditions
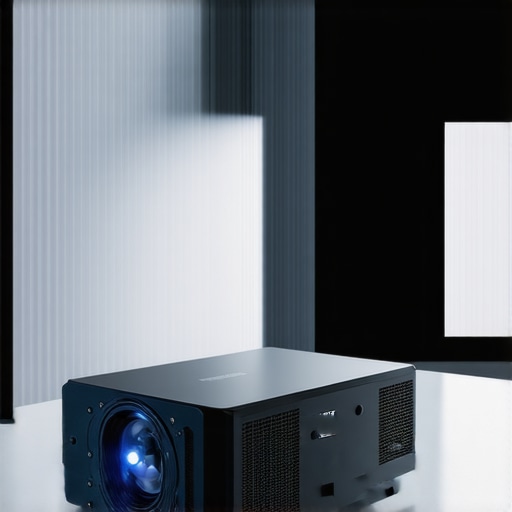
When pushing laser projectors, 4K models, portable units, UST (Ultra Short Throw), or home theater systems into real-world scenarios, their performance can vary significantly. These devices are often tested in controlled environments, but their true resilience and reliability emerge during practical, high-pressure usage.
How do laser projectors handle intense, prolonged use?
Laser projectors are renowned for their longevity and consistent brightness. In scenarios like hosting all-day events or continuous presentations, they typically outperform lamp-based models. However, extended operation can lead to overheating, especially if ventilation is inadequate. For example, in conference settings with poor airflow, some laser projectors may reduce brightness or shut down temporarily to prevent damage. The good news is that most high-end models incorporate advanced cooling systems, but their efficacy is tested when the ambient temperature spikes or when they’re run at maximum brightness consistently.
Can 4K projectors keep sharp images under adverse conditions?
4K projectors deliver outstanding detail, but their performance under pressure reveals limitations. Brightness levels, often specified under ideal lab conditions, may drop when an image is projected onto textured or uneven surfaces in less-than-ideal lighting. Additionally, high bit-depth content demands significant processing power; thus, some models may experience lag or frame drops during intense use, such as gaming or fast-paced video playback. Fans of crystal-clear visuals should consider the projector’s heat management—overheating can cause the device to throttle performance, degrading image quality.
How portable projectors adapt to challenging environments?
Portable projectors offer flexibility, but their compact design often sacrifices cooling capacity. When used outdoors or in poorly ventilated rooms, they can quickly heat up, leading to thermal shutdowns or reduced brightness. For instance, a battery-powered projector used during a camping trip or outdoor movie night might struggle in hot weather, with performance dips as the device’s internal temperature rises. While lightweight, these projectors shine in scenarios prioritizing convenience over sustained performance.
The real test for UST projectors lies in their setup and environmental control
Ultra Short Throw projectors excel in tight spaces, like small living rooms, but their performance depends heavily on the environment. Dust, uneven surfaces, or bright ambient light sources sharply impact image quality. Under pressure, such as during ongoing use with fluctuating lighting conditions, UST projectors may struggle to maintain a crisp, high-contrast image. Their internal cooling systems, though efficient, can be overtaxed if the device is placed too close to heat sources or if airflow is obstructed.
What about home theater systems facing continuous usage?
Home theater projectors are designed for prolonged sessions, but their performance reveals compromises. Long viewing sessions can lead to lamp or laser degradation over time, potentially altering image consistency. Additionally, the complexity of calibration and environmental control—like controlling ambient light and maintaining proper distance—becomes critical during extended use. Failure to address these factors can result in duller images, color imbalances, or even thermal shutdowns.
Overall, high-performance projectors are tested most rigorously in their ability to endure real-world pressures—extended operation, challenging lighting, or uneven surfaces. Users should consider their environment’s specifics and the device’s cooling and power management features before deploying projectors in demanding contexts. Do you agree with my assessment of how these devices handle stress? Share your experiences below or check out discussions on Reddit’s AV community for further insights.
Comparing Laser Projector Deals and 4K Models to the Competition
When shopping for high-end projection systems, options abound, each with distinct advantages. Laser projectors, especially those offering 4K resolution, are often positioned as premium choices due to their brightness, longevity, and image fidelity. However, alternatives like traditional lamp-based projectors or DLP models may appeal to budget-conscious consumers. Laser projector deals stand out for their impressive lifespan and low maintenance, but they typically come at a higher initial cost compared to standard 4K projectors, which may utilize LED or lamp technology.
Leading brands like Epson and Sony have pioneered laser projectors that deliver remarkable contrast ratios and high dynamic range, outperforming conventional models in darker rooms. For instance, Sony’s VPL-FHZ120L offers 4K resolution and laser light source at a price point that, while steep, promises years of reliable performance without bulb replacements. Conversely, DLP projectors may offer similar resolution at a lower price point but often lack the same longevity and typically require lamp replacements every 2,000-4,000 hours, increasing long-term costs.
Now, how do portable projectors fit into the picture? Portable options, including compact LED and mini laser models, are perfect for on-the-go use and smaller spaces but usually sacrifice brightness and resolution to achieve portability. When comparing UST (Ultra Short Throw) projectors, models like the Samsung The Premiere deliver large images from close range, directly competing with fixed-frame 4K projectors, but at a premium. UST projectors excel at space-saving setup but may struggle with ambient light, something traditional 4K models can handle more flexibly.
For those seeking a home theater experience, dedicated screens with high-end projectors provide superior contrast, color accuracy, and overall image clarity. Brands like JVC and Sony dominate this segment, yet their models are generally more expensive. Cheaper options, like some budget 4K projectors from BenQ or Optoma, offer decent performance but fall short of the premium black levels and seamless motion handling of top-tier units.
Is it worth the upgrade?
If you’re considering whether to invest in the latest laser projector deals, 4K models, or a portable setup, weigh the benefits against your needs and budget. Laser projectors usually justify their premium price with long-term savings and superior performance, especially in demanding environments. Conversely, if your room lighting conditions fluctuate or you’re on a tight budget, a high-quality 4K lamp projector might suffice, offering a middle ground between cost and quality. For portable or space-constrained setups, UST projectors are attractive, but their performance heavily depends on room conditions and ambient lighting. Check current prices to see if the latest deals align with your expectations, and consider reviewing comparison guides to make an informed choice.
The Good, The Bad, and The Ugly
- Pros: Cost-effective methods to improve image clarity; easy DIY solutions; effective room lighting adjustments; projector calibration tips for sharper visuals; affordable wall treatment ideas to boost contrast.
- Cons: Painted or DIY surfaces require time and effort; surface imperfections may still limit image quality compared to specialized screens; ambient room conditions can be challenging to control fully; some techniques might not yield professional-grade results.
Who Should Try This?
Perfect for budget-conscious home theater enthusiasts, casual viewers, or anyone eager to enhance their projector image without investing in expensive screens or equipment. If you’re willing to put in a little effort, these tips can drastically improve your viewing experience.
Skip this if you demand studio-quality visuals; professional installers or those seeking perfect contrast ratios on demanding surfaces should consider dedicated projection screens and high-end gear for optimal results.
Final Wrap-Up: Is It Worth the Effort?
Yes. For most casual users, these low-cost modifications and calibration techniques provide a significant upgrade over unrefined, washed-out images from budget walls. While never matching the performance of specialized screens, they offer an excellent balance between cost and visual improvement. To get the most out of your setup, explore our detailed guide and check the latest prices for accessories and paint options.